Is your dryer taking longer to dry clothes? It might be time to clean your dryer duct! Follow our step-by-step guide for a safe and effective cleaning.
Importance of Cleaning Your Dryer Duct
Cleaning your dryer duct is a crucial task that often gets overlooked by homeowners. When lint and debris accumulate in your dryer duct, it can significantly reduce the efficiency of your dryer. This not only leads to longer drying times but also increases your energy bills. A clogged dryer duct forces your dryer to work harder, consuming more electricity and wearing down the appliance faster. Regular cleaning ensures your dryer operates efficiently, saving you both time and money in the long run.
Moreover, a clogged dryer duct poses a serious fire hazard. Each year, thousands of house fires are attributed to dryer lint buildup. When the duct is obstructed, heat generated by the dryer can ignite the accumulated lint, leading to devastating fires. By routinely cleaning your dryer duct, you minimize this risk, safeguarding your home and loved ones. Fire prevention is reason enough to prioritize this often-neglected chore.
In addition to fire safety and efficiency, clean dryer ducts contribute to better indoor air quality. When the duct is blocked, moisture and lint can back up into your home, potentially causing mold growth and releasing allergens into the air. Maintaining a clean duct helps ensure that the hot, moist air from your dryer is properly vented outside, keeping your indoor environment healthier. All these factors highlight the importance of making dryer duct cleaning a regular part of your home maintenance routine.
Signs Your Dryer Duct Needs Cleaning
Recognizing the signs that your dryer duct needs cleaning can save you from potential hazards and costly repairs. One of the most noticeable signs is an increase in drying time. If your clothes are taking longer to dry than usual, it’s a clear indication that your dryer is struggling to expel hot, moist air due to a blocked duct. This not only wastes energy but also reduces the lifespan of your dryer.
Another telltale sign is an unusually hot dryer or laundry room. If the exterior of your dryer feels excessively hot to the touch or if the room becomes warmer than normal, it suggests that the air is not being properly vented. This trapped heat can be dangerous and is a strong indicator that your duct needs immediate attention. Additionally, if you notice a burning smell while your dryer is running, turn it off immediately and inspect the duct.
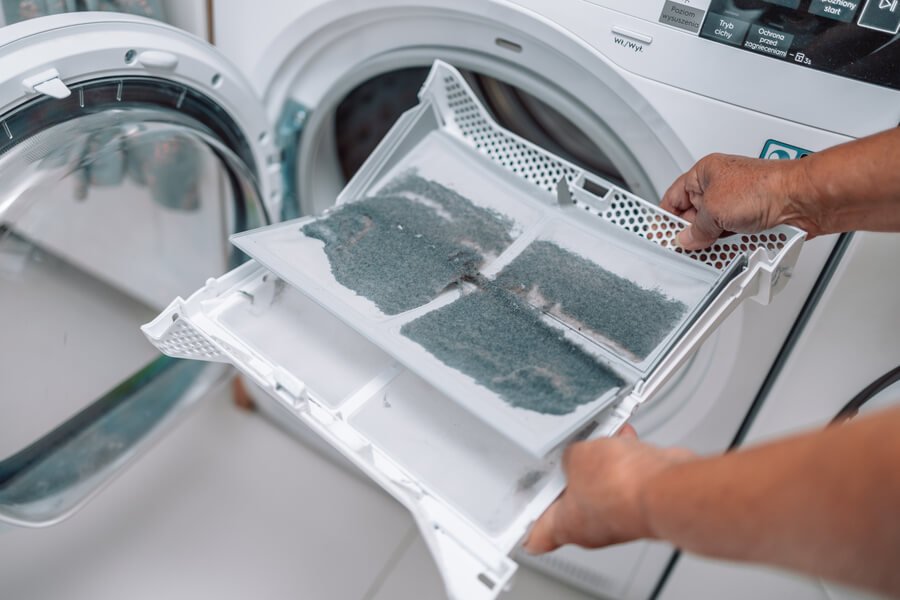
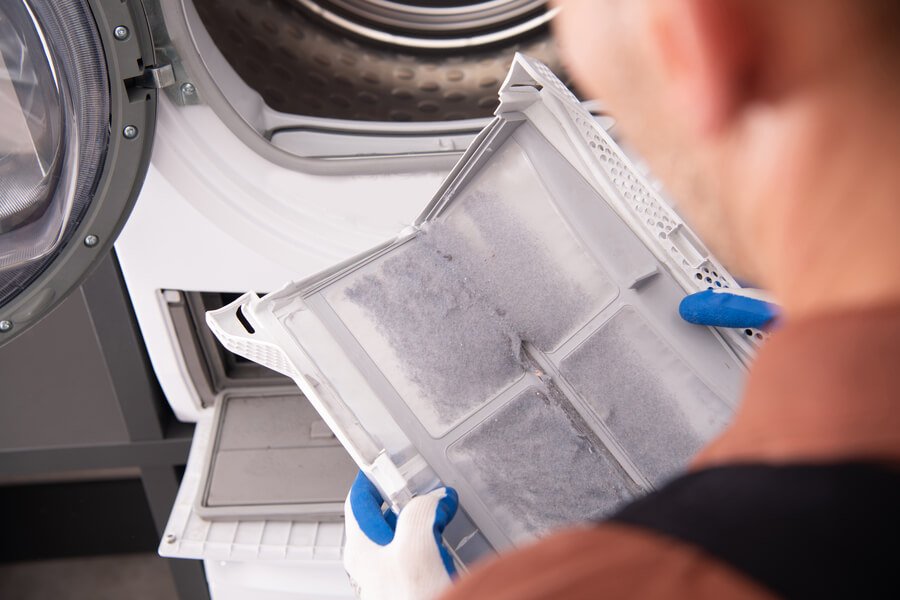
Excessive lint buildup around the dryer’s lint trap or on your clothing is another red flag. While some lint accumulation is normal, an excessive amount can signal that lint is not being appropriately captured and is instead clogging the duct. Visible lint around the dryer vent or outside vent hood is also a sign that it’s time to clean your dryer duct. Ignoring these signs can lead to more serious issues, so it’s important to address them promptly.
Tools and Materials Needed for the Job
Before you start cleaning your dryer duct, gather the necessary tools and materials to ensure the job is done efficiently and safely. First, you will need a vacuum cleaner with a hose attachment. This will help you remove lint and debris from the duct and around the dryer. If you don’t have a vacuum, a handheld vacuum or a shop vac can also work effectively.
Next, you’ll need a dryer vent cleaning kit, which typically includes flexible rods and brushes designed to navigate through the duct. These kits are available at most hardware stores and are specifically designed to reach and clean the inside of dryer ducts. The brushes help dislodge lint and debris, making it easier to vacuum out. Additionally, having a screwdriver on hand is essential for removing screws that secure the duct to the dryer and the wall.
Other useful materials include a flashlight to inspect the inside of the duct, a dust mask to protect yourself from inhaling dust and lint, and a pair of gloves to keep your hands clean. A ladder might be necessary if your dryer vent is located in a hard-to-reach area. Ensuring you have all these tools and materials ready before you begin will make the cleaning process smoother and more efficient.
Safety Precautions Before Starting
Before diving into the cleaning process, it’s crucial to take some safety precautions to protect yourself and your home. First and foremost, unplug your dryer from the electrical outlet. This eliminates the risk of electric shock while you’re working. If you have a gas dryer, make sure to turn off the gas supply to prevent any gas leaks or accidents. Safety should always be your top priority.
Next, ensure the area around your dryer is clear of any flammable materials or clutter. This will give you ample space to work and reduce the risk of accidents. It’s also a good idea to place a drop cloth or old towel under the dryer to catch any debris that might fall during the cleaning process. Wearing a dust mask and gloves will protect you from inhaling dust and lint and keep your hands clean.
Finally, make sure you have proper ventilation in the room. Open windows or use a fan to keep the air circulating, especially if you’re using cleaning agents or if the area becomes dusty. By taking these safety precautions, you’ll create a safer environment for yourself and ensure the cleaning process goes smoothly without any unnecessary risks.
Step-by-Step Guide to Cleaning Your Dryer Duct
- Disconnect the Dryer: Start by unplugging the dryer from the electrical outlet. If you have a gas dryer, turn off the gas supply. Carefully move the dryer away from the wall to access the duct. Be cautious not to damage the gas line if you have a gas dryer.
- Remove the Duct: Use a screwdriver to remove the screws that secure the duct to the dryer and the wall. Gently detach the duct from both ends. Inspect the duct for any visible lint buildup or blockages. If the duct is damaged or excessively dirty, consider replacing it.
- Vacuum the Duct: Use a vacuum cleaner with a hose attachment to remove as much lint and debris as possible from both ends of the duct. If your vacuum doesn’t reach far enough, use a dryer vent cleaning kit with flexible rods and brushes to clean the inside of the duct. Insert the brush into the duct and rotate it to dislodge the lint. Vacuum out the loosened debris.
- Clean the Vent Hood: Go outside and locate the vent hood where the duct exits your home. Remove any visible lint or debris from the vent hood. Use the vacuum or a brush to clean the vent hood thoroughly. Ensure the flaps on the vent hood can open and close freely.
- Inspect and Clean the Dryer: While the duct is disconnected, take the opportunity to clean the back of the dryer and the area around the lint trap. Use the vacuum to remove lint and debris from these areas. Check the lint trap for any damage and clean it thoroughly.
- Reassemble the Duct: Once you’ve cleaned both the duct and the vent hood, reattach the duct to the dryer and the wall. Secure it with screws and ensure the connections are tight. Make sure the duct is properly aligned and not kinked or crushed.
- Test the Dryer: Plug the dryer back into the electrical outlet. If you have a gas dryer, turn the gas supply back on. Run the dryer on a short cycle to ensure it’s working correctly and that the air is flowing freely through the duct. Check for any unusual noises or issues.
By following these steps, you can effectively clean your dryer duct and reduce the risk of fire hazards, improve dryer efficiency, and extend the lifespan of your appliance.
Common Mistakes to Avoid
When cleaning your dryer duct, it’s important to avoid common mistakes that can compromise the effectiveness of the cleaning process or even cause damage. One common mistake is neglecting to unplug the dryer or turn off the gas supply before starting. This can lead to electric shock or gas leaks, posing serious safety risks. Always ensure the power and gas supply are disconnected before you begin.
Another mistake is using the wrong tools. Using a household vacuum with a short hose or inappropriate attachments can make it difficult to reach deep into the duct. Invest in a dryer vent cleaning kit with flexible rods and brushes designed specifically for this task. These tools will make the job easier and more thorough, ensuring you remove all the lint and debris.
Failing to clean the entire length of the duct is another common error. Many homeowners only clean the accessible parts of the duct, leaving lint buildup in the harder-to-reach areas. This can still pose a fire hazard and reduce dryer efficiency. Make sure to clean the entire duct from the dryer to the vent hood. If you’re unable to reach certain areas, consider hiring a professional to ensure a thorough cleaning.
How Often Should You Clean Your Dryer Duct?
The frequency of cleaning your dryer duct depends on several factors, including the frequency of dryer use, the type of dryer, and the length of the duct. As a general rule of thumb, it’s recommended to clean your dryer duct at least once a year. This annual cleaning helps prevent lint buildup and reduces the risk of fire hazards. However, if you use your dryer more frequently or have a longer duct, you may need to clean it more often.
If you notice any signs that your dryer duct needs cleaning, such as longer drying times, excessive lint buildup, or a hot dryer, it’s important to address the issue immediately, regardless of when you last cleaned the duct. Regularly cleaning the lint trap after each use can also help reduce the amount of lint that accumulates in the duct, extending the time between cleanings.
For households with larger families or those who use the dryer multiple times a week, it’s a good idea to inspect the duct every six months and clean it as needed. By staying vigilant and proactive, you can ensure your dryer operates efficiently and safely, minimizing the risk of fire hazards and costly repairs.
Benefits of Professional Dryer Duct Cleaning
While DIY cleaning can be effective, there are several benefits to hiring a professional for dryer duct cleaning. Professionals have specialized tools and equipment that can thoroughly clean the entire duct system, including hard-to-reach areas. They can also identify and address any potential issues, such as damaged ducts or improper installations, that may not be apparent to homeowners.
Professional cleaners are trained to handle different types of dryer ducts and can ensure the job is done correctly and safely. They can also provide valuable advice on maintaining your dryer and duct system, helping you prevent future issues. Additionally, professional cleaning can save you time and effort, especially if you’re not comfortable or experienced with DIY cleaning.
Hiring a professional can also give you peace of mind knowing that your dryer duct has been thoroughly cleaned and inspected. This can reduce the risk of fire hazards, improve dryer efficiency, and extend the lifespan of your appliance. While professional cleaning may come at a cost, the benefits and added safety make it a worthwhile investment for many homeowners.
DIY vs. Professional Cleaning: What to Choose?
Deciding between DIY and professional dryer duct cleaning depends on several factors, including your comfort level, budget, and the condition of your duct system. DIY cleaning can be a cost-effective option for homeowners who are comfortable handling the task and have the necessary tools. It allows you to take control of the cleaning process and can be done at your own convenience.
However, DIY cleaning may not be suitable for all situations. If your duct system is complex, difficult to access, or has significant buildup, professional cleaning may be the better option. Professionals have the expertise and equipment to handle more challenging jobs and can ensure a thorough cleaning. They can also identify and address any underlying issues that may be affecting your dryer’s performance.
Ultimately, the choice between DIY and professional cleaning comes down to your specific needs and circumstances. If you’re confident in your ability to clean the duct effectively and safely, DIY cleaning can be a great option. On the other hand, if you prefer the assurance and convenience of professional service, hiring a professional can provide peace of mind and ensure the job is done right.
Conclusion and Final Tips for Homeowners
Cleaning your dryer duct is an essential task that can improve dryer efficiency, reduce energy costs, and prevent fire hazards. By following our step-by-step guide and taking the necessary safety precautions, you can effectively clean your dryer duct and maintain a safe and efficient laundry room. Remember to regularly inspect and clean your duct, and don’t hesitate to seek professional help if needed.
In addition to cleaning the duct, it’s important to regularly clean the lint trap after each use and ensure the vent hood is free of obstructions. These simple maintenance tasks can go a long way in keeping your dryer operating smoothly and safely. Stay vigilant for any signs that your duct needs cleaning, such as longer drying times or excessive lint buildup, and address them promptly.
By making dryer duct cleaning a regular part of your home maintenance routine, you can enjoy the benefits of a safer, more efficient dryer. Whether you choose to tackle the task yourself or hire a professional, the key is to stay proactive and ensure your dryer duct is clean and well-maintained. Your efforts will pay off in the form of improved performance, lower energy bills, and a reduced risk of fire hazards.